Toddler Activities: Candy Tree
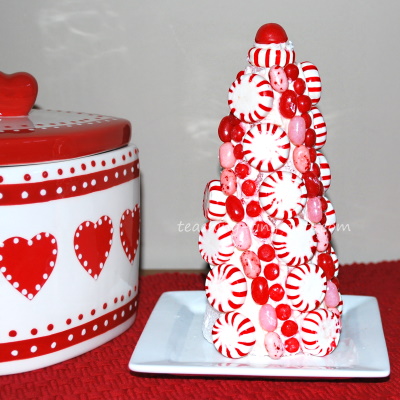
Toddler Activities: Decorative candy tree makes a nice Christmas centerpiece or home decoration for the holidays.
Description
This was done using a cone shaped Styrofoam found in any craft store, or Walmart craft area. When we were finished decorating, we put a tablespoon of frosting on the plate and placed the decorated cone onto it.Materials
Styrofoam cone
Peppermints, Jelly Bellies and Red Hots
White Cake Frosting (Duncan Hines for example)
Other Materials
Small dish or muffin tin for candies
Spatula
Plastic butter knife
Steps
- Frost cone. We did half at a time.
- Place frosting on the surface the cone will sit on and place cone on it.
- Pour/sort candies into small dishes or a muffin tin.
- Stick on the candies. For areas that need more frosting we used a small plastic knife to add more to the back of the candy.
- Frost the other side and add more candies.
- Let set until frosting has hardened.
Tips and Suggestions
- For best results use CAKE FROSTING to stick on candies. We tested Craft Glue, Wilton Icing and Frosting. We found the Wilton Icing is good for flat areas and helps define where to place candies but for any sides, cones or non flat surfaces, use cake frosting. The candy with stick and NOT slide.
- If you choose to do a pattern, lay out the candies on the waxed paper.
- We frosted half at a time so frosting wouldn't dry out.
- For round objects, let half set before doing the other side.
- For other shapes, we found pre made foam shapes like circles, stars and hearts for one US dollar at Michael's Craft Store.
- Keep out of reach of very young children when displaying! It is very irresistible looking!
Educational Tip
Sort candies into muffin tins by type, shape or color. Make a few simple patterns together with your child on the waxed paper to help develop patterning skills.Another Christmas Tree Idea
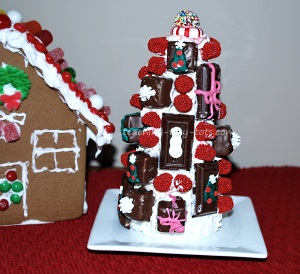
Christmas Chocolate Tree
Description
This was done using a cone shaped styrofoam found in any craft store, or WalMart craft area. When finished decorating, we put a TBS of frosting on the plate and placed decorated cone onto it. Due to the decorating of the chocolates this is a little trickier and more appropriate for 4+ or an adult to make the designs.Materials
- Styrofoam cone
Mini Chocolates in squares and small rectangles, Small Candies
Duncan Hines White Frosting
- Cookie Icing in tubes with the decorator tips.
Designs
We used the flower shape tip and just squeezed it onto the chocolate, the pointed tip for a simple bow, and again the pointed tip for three dots for the snowman. We used a marker to make eyes when dried.Steps
- Frost cone. We did half at a time.
- Place frosting on the surface the cone will sit on and place cone on it.
- Pour/sort candies into small dishes or a muffin tin.
- Stick on the candies. For areas that need more frosting we used a small plastic knife to add more to the back of the candy.
- Frost other side and add more candies.
- Let harden.
