Construction Gingerbread House Recipe
Description
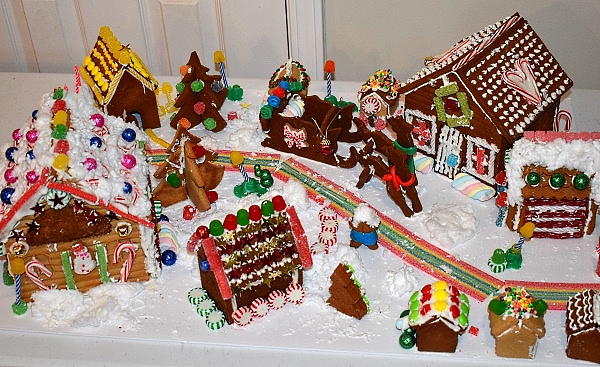
This year we went all out and made a Gingerbread House village. Below is our recipe that we used. It is a combination of a couple recipes that has worked well to make a Construction Gingerbread House that is very strong. One of the original recipes was in grams so we weighed all the ingredients and converted it to cups, tablespoons and teaspoons. It isn't a gingerbread recipe for snacking on, but it does hold up very well baking and constructing, and displaying.
We baked the pieces a couple weeks in advance. The pieces remained strong and smelled wonderful. This was perfect as we were able to bake the pieces over several days. We wrapped the house panels in saran wrap and placed in a large Tupperware. We stored the smaller pieces in a tin. We went to the Dollar Tree and bought a wide variety of candies to build with. We found some cute sprinkles at Michaels and Walmart. We also had some none edible décor like mini lights and bells.
For a village we made 2 double batches of the original recipe.
Construction Gingerbread Recipe
- 5 cups flour
- 3/4 tsp cinnamon
- 1/4 tsp ground ginger
- 1/2 tsp nutmeg
- 1/4 tsp cloves
- 3/4 tsp salt
- 1 cup and 2 TBS vegetable shortening (Crisco in tub)
- 3/4 cup + 2 TBS granulated sugar
- 1 1/2 cup molasses
- 1 Large Egg
Icing Recipe
- 3 Egg Whites
- 1/2 teaspoon Cream of Tartar
- 1 Box of Confectioner's Sugar (Powdered Sugar)
Silicone and Molds
- We bought the mold for the large house on Amazon. This is a similar Gingerbread House Silicone Mold to the one we used for the largest house.
- This makes Mini Gingerbread Houses. They houses are about 2" tall.
Directions
- Sift your dry ingredients together, set aside.
- Melt Crisco Shortening in a pot on low heat until melted, but not hot. You can also microwave the vegetable shortening.
- Pour the shortening into a large bowl. Using a mixer, whisk shortening, sugar and molasses together. Add the egg and mix until combined.
- Add your dry ingredients in small batches and mix on medium/low until a smooth ball starts to form. Do not over mix.
Rolling Out the Dough
- Wrap dough in Saran Wrap and refrigerate for a couple hours or freeze for about 20 minutes.
- Lightly sprinkle flour on a piece of parchment paper. Sprinkle flour onto your rolling pin as well.
- Roll out dough onto parchment paper or a baking mat to 1/4" thick. Roll until it is as even as possible.
- For cookie cutters, press the cutter into the dough and peel away the excess, then lift the cutter. Do not move the pieces. Bake using this piece of parchment to keep the shape of your pieces. Transferring to another piece of parchment can cause the shape to warp slightly. This is important if you have interlocking pieces like the trees and sleigh with reindeer that we made.
- For the silicone molds, we cut the dough using a paper pattern matching the size of the mold. We lightly dusted the pattern with flour to minimize sticking. Cut with a butter knife or an adult can cut with a paring knife. Lay the piece of cut gingerbread dough into the mold and press gently to make sure the dough fills the entire shape. Using the rolling pin, gently roll on top to help get a clean impression. Using the paring knife, trim any excess.
Baking Your Gingerbread
- Bake in an oven at 300 degrees for 30-40 minutes depending on the thickness of the piece. This may vary with different ovens as well so test a few pieces first. We rotated the cookie sheet halfway. Watch closely as gingerbread can burn pretty easily.
- Cool entirely on baking sheet before moving.
Icing Directions
- Add the ingredients together and beat until smooth. Sifting the confectioners sugar will make it smoother. We added more sugar until we reached the consistency we desired. We liked it a little thicker so we added about an extra cup. For a house this recipe should be sufficient. We used 3 batches to finish our scene.
- Fill pastry bags with small tips. We used the round tips and prefer the Wilton brand bag which was a little thicker and easier to manage than another less expensive brand.
Building Your Ginger Bread House
Directions
- Lay out your pieces on the surface you want to build on.
- Fill pastry bags with tips with your icing. To fill fold down the top so the icing fills the bottom of the bag. Unfold after filling and twist so that the icing doesn't come out the top of the pastry bag.
- Glue the walls of the house first with a thick line of icing. Let the walls "dry" and harden before putting on the roof. Let the house set for a few minutes before decorating.
- Use candies and sprinkles to decorate. See our list below for more ideas.
Tips
- Make sure that your pieces are baked all the way through or it will soften and break.
- If you are using silicone molds, do not fill all the way to the top to allow for some expansion.
- Depending of the thickness of your pieces, you will need to adjust your baking time.
- When constructing the houses, working in pairs works best.
- Add more powdered sugar to your icing to make it stiffer.
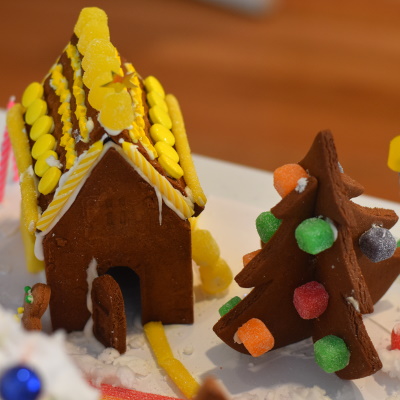
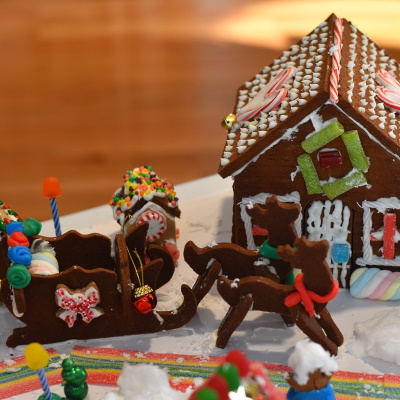
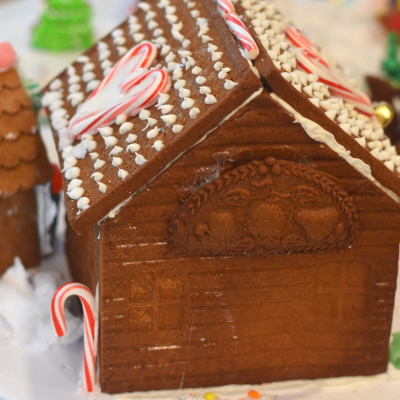
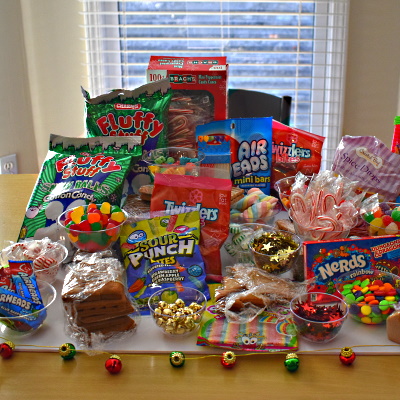
Building a Gingerbread Village
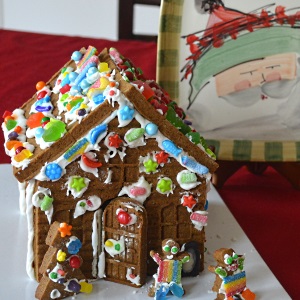
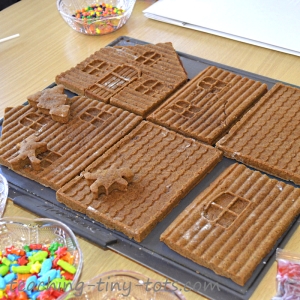
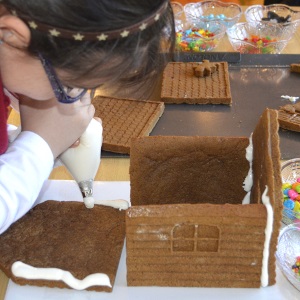
Candies Used to Decorate our Gingerbread Houses and Scene
- Gun Drops
- Wrapped Peppermints
- Small Candy Canes
- Air Heads
- Twizzlers, Long and cut pieces
- White Cotton Candy to make snow
- Nerds
- Spree
- Gummy Tubes, strings
- Sprinkles
Non Edible Decorations
- Gold foil stars
- Mini Ornaments and Mini Bells
- Candles
Easy Graham Gingerbread House
Description
Gingerbread Houses are an all time favorite holiday activity! Make with your child or tailor the recipe for a group of children. It was an annual school wide activity and with the help of staff, parents and teachers it was a fun filled afternoon. Photo is of a gingerbread house the girls made when they were two years of age at a play date without the milk carton.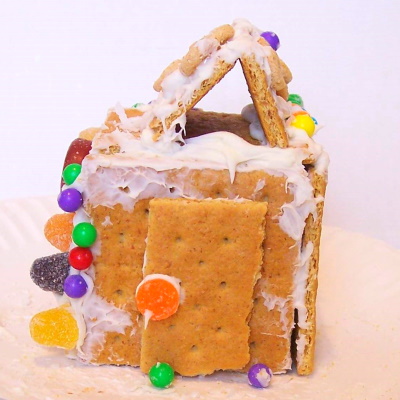
- 1 Milk Carton (1/2 pint size) Rinsed, dried and stapled shut on top. It is easier for young children to build with the milk carton giving it shape and structure.
Sturdy Paper Plate, Meat Tray or Cardboard Piece.
Small paper cups/containers for frosting and popsicle sticks, wooden ice scram spoons for younger children. Plastic Knife for older toddlers. Spoon to scoop frosting into cups.
Sheet of Wax Paper or parchment paper.
5 Squares of Graham Crackers (Honey Maid Brand)
Icing: See Recipe Below
Assortment of Decorating Items: Small M and M's, Fruit Loops, Trix, Miniature Marshmallows, Raisins, Dried Cranberries, Pretzels, Small Candies like Gum Drops, Candy Corn and Red Hots. You can also use crushed candy canes and sprinkle.
Materials
- Newspaper, plastic table cloth or shower curtain liner to cover tables
- Plastic bag with tie to hold completed house
- Small freezer ziplocks to make icing bags
- Paper towels or wet wipes for clean up
Icing Recipe
Ingredients- 3 Egg Whites
- 1/2 teaspoon Cream of Tartar
- 1 Box of Confectioner's Sugar (Powdered Sugar)
- Beat Egg whites and cream of tartar until frothy.
- Add sugar and beat 5-7 minutes more (until peak consistency).
- Store in an air-tight container. Refrigerate if not using right away.
Directions
- Place a dab of frosting under the milk carton and secure to the paper plate, meat tray of cardboard piece.
- Spread icing on four squares of graham crackers and stick to sides of the milk carton for walls.
- Break the last graham square in half. Spread on icing on the cracker and put on top of the slopes of the milk carton for the roof.
- Fill a ziplock bag and snip corner. Squeeze icing out to fill in all spaces where milk carton is visible.
- Decorate!
- Use extra crackers or broken pieces for windows, doors, chimney, etc.
- Put two mini marshmallows together with frosting to make a snowman next to the house.
- Make a fence around the house by using gumdrops and a pathway to house using M and M's.
Tips and Suggestions
- Have pictures of gingerbread houses available for children to see.
- Small Containers to put icing in while decorating. (Take out only small amount at a time because icing will harden.
- Glue the milk carton to plate ahead of time.
- This is great activity for a kid play date or Christmas party.
